

A sharp knife is safer than a dull one — it cuts where you aim it instead of slipping. Whetstone sharpening is the slowest method but produces the best edge, and it's the foundation skill every butcher should learn. Here's how to do it properly.
What you'll need
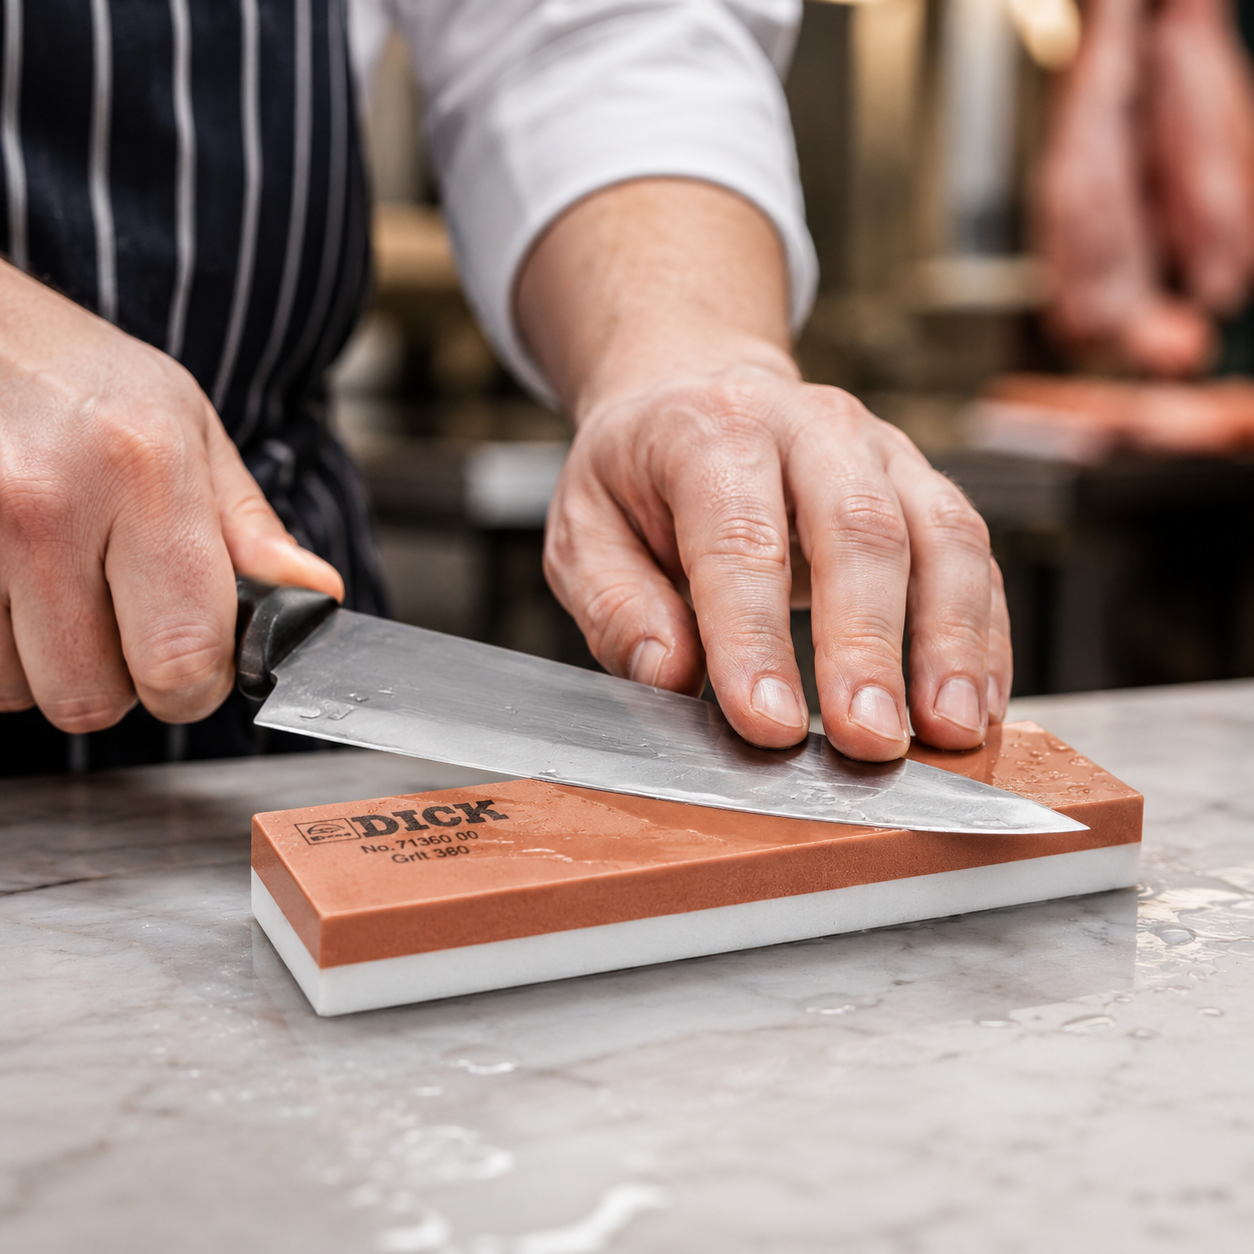
- A whetstone with two grits — coarse (around 1000) and fine (3000–6000). Our sharpening stones range includes Japanese-style double-sided options that cover both.
- A flat, stable surface — a damp cloth underneath the stone prevents it sliding
- Water (for water stones) or honing oil (for oil stones) — check what your stone requires
- The knife to be sharpened
- A tea towel for wiping and testing
Step 1: Prepare the stone
If you're using a water stone, soak it in water for 10–15 minutes before starting — until bubbles stop rising. Oil stones need a light coating of honing oil before use. Place the stone on the damp cloth, coarse side up first.
Step 2: Set the angle
Hold the knife so the blade meets the stone at approximately 15–20 degrees. As a rough guide, that's roughly the angle of two stacked 50p coins under the spine of the blade. European-style knives (Victorinox, F. Dick) use around 20 degrees; Japanese knives use closer to 15.
Consistency matters more than the exact angle. Whatever you choose, stick to it through the whole sharpening session.
Step 3: Sharpening strokes
Place the heel of the blade against the stone at your chosen angle. With light pressure (the weight of the knife itself is enough), draw the blade across the stone in a sweeping motion, moving from heel to tip. Push the blade as if you're trying to shave a thin layer off the stone.
Do 8–10 strokes on one side, then flip the knife and do the same number on the other. Keep the angle consistent.
Step 4: Check for the burr
After several rounds of strokes, run your fingertip away from the edge on the opposite side from the one you've been sharpening. You should feel a slight roughness — the burr. That's your signal that you've ground the edge down enough on that side. Move to the other side and repeat until you can feel a burr there too.
Step 5: Switch to the fine grit
Flip the stone to the fine grit side (or switch stones). Repeat the same sweeping strokes, alternating sides every few strokes now. The fine grit polishes the edge and removes the burr — you're refining, not removing more metal.
Step 6: Test sharpness
Wipe the blade clean. The simplest test: try to slice through a sheet of paper held vertically. A properly sharpened blade slices clean without tearing. Or shave a thin slice off a ripe tomato — if it bites without crushing, you're done.
Common mistakes
- Inconsistent angle. The most common cause of a knife that won't sharpen. Build muscle memory with the first stone before moving to the second.
- Too much pressure. You're refining the edge, not grinding meat. Light pressure with the right technique beats heavy pressure with the wrong one.
- Skipping the burr check. If you don't feel a burr, you haven't sharpened enough.
- Not flattening the stone. Whetstones develop a dip in the middle over time. Flatten them periodically with a flattening stone or coarse sandpaper on a flat surface.
How often to sharpen
For a butcher shop knife in daily use: a full whetstone sharpening every 2–3 weeks, with daily honing on a sharpening steel to maintain the edge between sessions. The steel doesn't sharpen — it realigns the edge. The whetstone does the actual sharpening.
Browse our whetstones and full sharpening range, or get in touch for advice on what's right for your knives.


